
For any woodworking project, wood is a very flexible tool. It’s great for art, home decor designs, and even jewelry making.
Painting, staining, or leaving wood unfinished are both options.
The options are limitless. Woodworking is a gratifying pleasure that can be enjoyed for a lifetime and handed on through generations of sons and daughters.
Simple woodworking skills, a battery of power and hand tools, some spare time, and a little creativity are all that’s needed.
There are a plethora of brilliant, imaginative, special, entertaining, and fascinating ways to put your scrap wood to good use!
This list contains 10 scrap wood ventures that will make you reconsider the utility of your scrap woodpile.
Table of Contents
Wooden Triangle Plant Holder

A regular terra cotta plant pot is placed into a hole in this wood triangle, resulting in a lovely wall-mounted plant keeper.
It has a perfect, organic feel to it because it is made of raw wood. Birch plywood, a mitre saw, wood glue, a hole saw, a drill, nails, and a hammer are all options.
You will make it by cutting a 30-degree angle on one end of each board with a mitre saw, flipping the wood 180 degrees, and measuring the length of the shelf bits.
Cut the opposite end at a 30-degree angle to the target length. Measure to the middle of one section then cut a hole the size of the planter right under the bottom with a hole saw.
Apply wood glue to the ends and join the two bits.
Allow a minute for the glue to dry before pre-drilling holes and nailing the boards together. Using a nail or screw in the wall to place the triangle on it to hang.
(Make sure it’s sturdy enough to support everything you’re putting on it.) If hanging the triangle upside down, use two screws, one in each corner.
Chess and Checkers Board
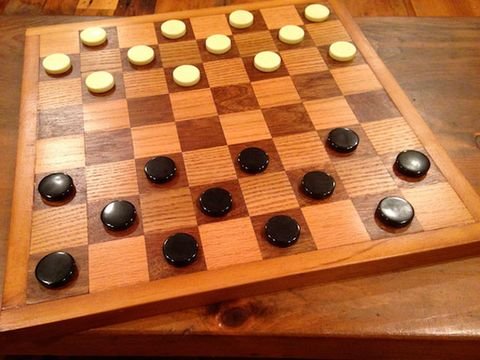
This game board is almost as much fun to build as it is to play on. It will also last for years, allowing the family to hand it on to future generations of chess and checker players.
What you have to do is make an extra effort to get the pieces to play.
It may appear that it entails a time-consuming method of cutting and gluing together 64 small squares of wood, but this is far from the case.
This is a basic project that can be completed in a few hours over a few days. It’s possible that you already have everything you require in your store.
Workbench

This solid, robust, and attractive workbench is the ideal workspace partner for all types of construction projects.
Clear Douglas fir, LVL (laminated veneer lumber) joists sawed into narrow strips and glued into a slab, and MDO (medium density overlay), a form of plywood with a laminate base, make up the bench. Without a doubt, this is a large-scale undertaking.

It can, however, be built by any skilled woodworker with a table saw and planer.
Wood Vase
A stylish vase with your lovely flowers. This scrap wood vase has a cool asymmetrical look and is a perfect way to use up some of those wooden odds and ends.
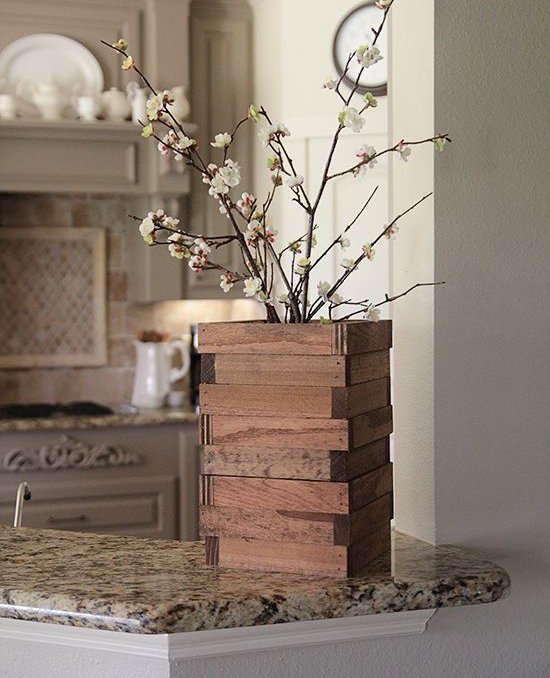
This is a super simple, quick, and inexpensive project… This is exactly what we’re looking for. 12 boards make up the whole sleeve.
Cut 32 bits, each about 7 inches long. To give it a more rustic appearance, make some just a hair bigger and some just a hair smaller.
You’ll want to make 8 squares after you’ve finished your cuts. When you’ve completed all eight squares, use glue to join them together.
To achieve the mismatched look, I flipped every other item. It only takes one coat of Supreme Wood Stain to dry in under an hour.
Wooden Doormat

A wooden doormat provides a warm welcome as well as a convenient place to scrape dust and dirt off boots and shoes.
This is a simple beginner DIY project that can be done with an old-school hammer and nails, a miter box, and some wood glue, and you can use your chop saw and nail gun.
The slats on the board work perfectly for scratching dirt off of sneakers and boots, making this doormat ideal for a house full of little boys who want to spend a lot of time outside.
Craft a Convenient Side Table
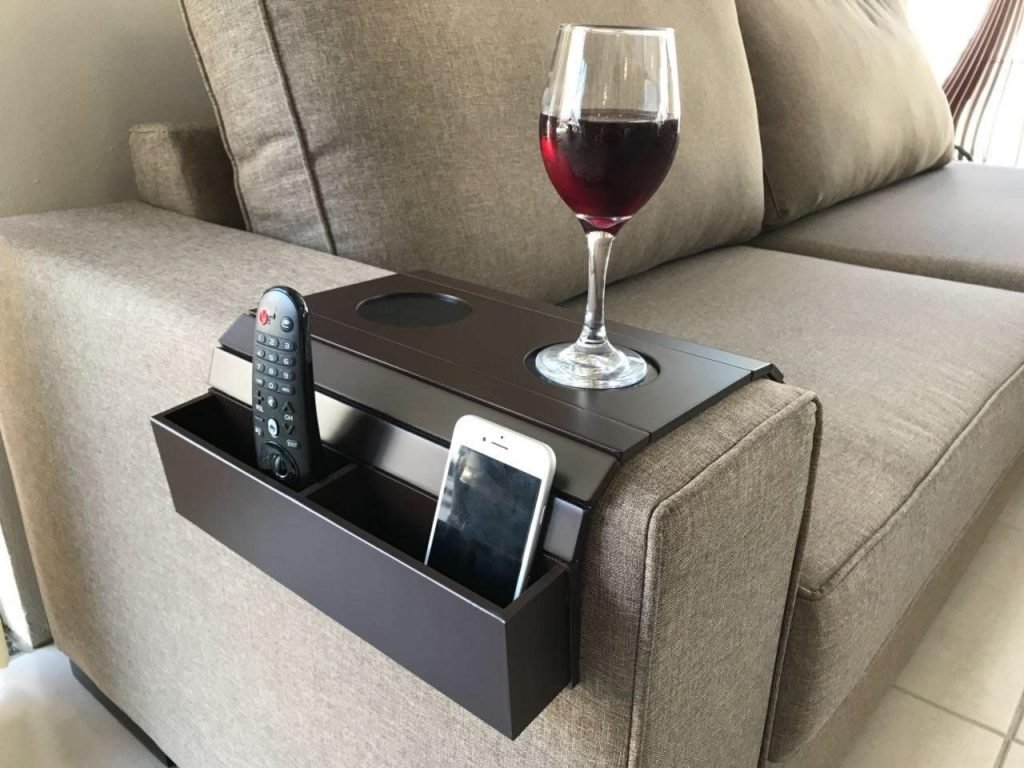
A sofa sleeve will hold your cup of coffee close to you as you relax on your couch, while still protecting your upholstery.
The clean, elegant look of this project’s simplistic construction complements a contemporary theme.
To make it, you’ll need a wooden block, wood glue, wood polish, grit sandpaper, and polyurethane.
Phone Charging Station

With this one-of-a-kind homemade mobile phone, you won’t have to worry about hideous chargers strewn around your tables.
It’s much simpler to make than it seems, and you’ll be delighted to charge your phone in your own handcrafted charging station.
This charging station resembles the more costly ones seen in retail stores, but it will cost you a fraction of the price.
Really, it won’t cost you much if you have a 2X4 on hand. All you have to do now is cut a piece of your wood, weigh the hole for your phone, and stain the board.
You can customize it to suit your phone, regardless of its form, so you won’t have to worry about it falling out when charging.
Jewelry Stand

Before you go to bed, here’s an easy way to store your watches and bracelets. The project isn’t too complicated, and the end product is beautiful.
To make it, you’ll need wood, a drill, glue, screws, and wood pressure.
Break the 2′′ wood dowel with the miter saw. Drill holes in the middle of your 2′′ wood dowel before marking the centre.
Inset the other wood dowel and squeeze a dab of wood glue into the opening on the 2′′ dowel. Using the wood stain to complete this jewelry stand. The jewelry stand is now full.
Succulent Frame

This project is incredibly cute! Beautiful scrap wood frames these little glass container succulents, which are hung with rope or twine.
To make the frame for this project, you just need one 1x3x6 board. Drill holes in one of your 15′′ bits as the first move. This will be the frame’s top piece.
The middle hole should be in the middle of the floor, and the two holes on each side should be 4′′ apart. Now it’s time to put the picture together! Begin by connecting the bottom and sideboards.
Between each joint, make sure to apply wood glue. Assemble the top section in the same manner. Apply a line of wood glue between each piece once more. And there you have it, your frame.
A-Frame Toolbox
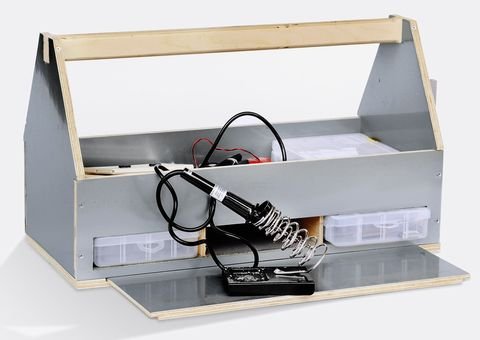
Carpenters, plumbers, electricians, and mechanics have all used traditional A-frame toolboxes for decades.
A-frame toolboxes with open tops are favored over boxes with hinged lids because they provide easy access to the equipment.
These boxes may seem to be a little shabby, but they are workhorses, not works of art.


